如何拯救被墙服务器

前提

首先你要确定你的服务器是否被墙了,先排除客观上的问题,诸如欠费、流量用尽、被恶意攻击、被当地运营商挂起等服务器处于异常状态,应先自行或联系客服解决。

然后再逐一排除问题: 1.管理后台显示 vps 运行正常,ssh 登录服务器也正常,但国内无法 ping 通,境外可以,一般该 IP 是被黑名单,测试方法可以参考载入IPIP进行甄别。

2.可以 ping 通,也可以 telnet 过去,但 ssh 无法正常登录,抓包或日志显示应答超时,这个时候一般是 TCP 阻断。

3.域名解析到该 IP 后网站加载一直在打转无法加载,一般是 IP 段已经被 DNS 污染。

4.连接不稳定,经常断线,连接服务器时候经常莫名被断线,敲击命令时候延迟非常大,极小概率为 TCP 干扰。

5.服务器 22/80/443 等常用端口一切正常,可是部分端口被关闭,排除运营商通知,一般是端口被墙。

补救

无论遇到哪种被墙的方式,都证明这台服务器不太安全了,你需要从根本上解决问题就是更换服务器,不过可以采取如下补救措施抢救一下:

1.向当地 idc 提出更换 IP,诸如 vultr 和 azure 都可以随时切换 ip 的。

2.使用跳板机,国内服务器转发。阿里云等厂商的服务器,或不过墙的 IPLC 服务器,大概率与被墙 vps 能直接通信,做个转发便即可正常使用,代价是多买一个国内服务器。顺道说一下,如果国外线路不好,用转发方式也能大幅提升网速,降低被墙概率,具体操作请移步附录。

3.使用 CDN 服务,CDN 的公共 ip 基本不会被封,将域名解析到 CDN,流量经过 CDN 再到被墙服务器,代价是需要一个域名并配置 CDN 服务。

4.换端口。针对端口被墙情形,更换新端口和加密方式,或者使用更高级的重建梯子方法,诸如 trojan/v2+1ray 等。

以上方法不能完全根除被墙的风险,俗称治标不治本,就敏感时期,应该低调、少上外网,需要从根本上解决问题还是更换服务器为妥。

附录

跳板机教程:

既然要通过国内服务器转发流量,首先必须要一台国内服务器。国内服务器的选择有很多,建议使用 NAT VPS,年付几十到一两百,NAT VPS 中转请参考:使用 NAT VPS 中转加速。也可以用阿里云、腾讯云这些大厂商的服务器,质量和服务都比较有保障。由于服务器仅做流量转发用,买最低配置的就可以,1 核 256m 内存足够,看视频的话带宽买大点,也可以选择流量计费模式(不适合视频党)。

本文以 CentOS 7/8 系统为例介绍国内服务器中转配置,分别介绍 firewalld 流量转发和 nginx 流量转发两种方式。

使用 Nginx 流量转发

1.安装 Nginx

2.配置 nginx

1
2
3
4
5
6
7
8
9
10
11
12
13
14
15
16
17
18
19
20
21
22
23
24
25
26
27
28
29
30
31
32
33
34
35
user nginx;
worker_processes auto;
error_log /var/log/nginx/error.log;
pid /run/nginx.pid;

# Load dynamic modules. See /usr/share/doc/nginx/README.dynamic.
include /usr/share/nginx/modules/*.conf;

events {
worker_connections 1024;
}

# 转发配置开始
stream {
server {
listen 端口号; # 1-65535的任意一个数字,无需与境外服务器的端口号相同
proxy_pass 境外ip:境外端口号; # 用境外ip和端口号替换
}
}
# 转发配置结束

http {
log_format main '$remote_addr - $remote_user [$time_local] "$request" '
'$status $body_bytes_sent "$http_referer" '
'"$http_user_agent" "$http_x_forwarded_for"';

access_log /var/log/nginx/access.log main;

sendfile on;
tcp_nopush on;
tcp_nodelay on;
keepalive_timeout 65;
types_hash_max_size 2048;
....
}

3.检查错误

nginx -t

如显示

nginx: the configuration file /etc/nginx/nginx.conf syntax is ok nginx: configuration file /etc/nginx/nginx.conf test is successful

则配置正常,如果有问题,请按照提示更改,这里提两个常见问题。

1.查看防火墙有没有放行 nginx 监听的端口firewall-cmd --state输出 running 表示防火墙正在运行,如果显示没有此命令则为防火墙未安装。可以使用以下命令将端口放行。

1
2
firewall-cmd --permanent --add-port=nginx中配置的端口号/tcp
fireawll-cmd --reload

如果服务器厂商上层还有安全组/防火墙,诸如阿里云/腾讯云等购买的 vps,请记得也要到控制台放行相应端口。

Nginx 效率不如 firewalld/iptables,但是配置更灵活,使用上更便利。

使用防火墙(内核)方式流量转发

1.确认是否安装防火墙,检测与安装如下

1
2
3
4
5
firewall-cmd --state

yum install -y firewalld
systemctl enable firewalld
systemctl start firewalld

2.配置转发

1
2
3
4
5
6
7
8
9
10
11
echo 'net.ipv4.ip_forward = 1' >> /etc/sysctl.conf
sysctl -p
firewall-cmd --permanent --add-masquerade
# 9090可以改成其他端口
firewall-cmd --permanent --add-port=9090/tcp
# 一般TCP即可以下也是
firewall-cmd --permanent --add-port=9090/udp
# 9090和上面保持一致,国外ip改成你国外vps的ip,443改成国外服务器端口
firewall-cmd --permanent --add-forward-port=port=9090:proto=tcp:toaddr=国外ip:toport=443
firewall-cmd --permanent --add-forward-port=port=9090:proto=udp:toaddr=国外ip:toport=443
firewall-cmd --reload

以上就配置结束了。

如果中转 trojan 流量,需要在客户端配置文件中的两个 verify 选项设置为 false
springfox-swagger-ui Nginx 404问题

前言

本文解决 springfox-swagger-ui 在二级目录下的使用问题。如同一个域名的 /user 和 /post 用 Nginx 分别反向代理指向不同的应用,我们希望在每个应用中都可以正常使用 Swagger。

下面,我们假设要配置 /user 指向 user 应用。

很多人爱折腾,会打起修改源码的主意,希望本文能帮你节省点时间。

注意:本文使用的 springfox-swagger2 版本是 2.9.2

解决方法 - 1

修改全局 context path

Spring Boot 环境中只要配置以下环境变量即可:

server.contextPath=/user

那么你的所有的接口,默认就都是在 /user 下面了,自然 swagger-ui 也就能正常使用了,访问 /user/swagger-ui.html 即可。

这是最最简单的方法,不过在有些特定的环境中会有问题,比如我司:

由于设置了 contextPath,那么健康检测接口 /health 也会被自动换为 /user/health,而我们的发布系统一根筋地要找 /health 接口,也就导致我们的应用会发布不了。

只有在碰到这种方法解决不了的时候,我们才要考虑使用下面介绍的方法。

解决方法 - 2

使用 Controller 做 forward

首先,将 /user/swagger-ui.html forward 到 /swagger-ui.html。

1
2
3
4
@GetMapping("/swagger-ui.html")
public String index() {
return "forward:/swagger-ui.html";
}

剩下的其实很简单,大家打开 your-domain/user/swagger-ui.html 页面,发现可以看到 swagger-ui 页面,但是接口列表没出来。

然后打开浏览器控制台,就会发现,它有很多发向 /user/webjars/… 和 /user/swagger… 的请求都是 404,我们只要一一把这些请求搞定就 OK 了。

1
2
3
4
5
6
7
8
9
10
11
12
13
14
15
16
17
18
19
20
21
22
23
24
25
26
27
28
29
30
31
32
33
34
35
36
37
38
39
40
41
42
43
44
45
46
47
48
49
50
@Controller
// 看这里
@RequestMapping("user")
public class SwaggerController extends BaseController {

@GetMapping("/swagger-ui.html")
public String index() {
return "forward:/swagger-ui.html";
}

@GetMapping("/webjars/springfox-swagger-ui/css/{s:.+}")
public String css(@PathVariable String s) {
return "forward:/webjars/springfox-swagger-ui/css/" + s;
}

@GetMapping("/webjars/springfox-swagger-ui/{s:.+}")
public String baseJs(@PathVariable String s) {
return "forward:/webjars/springfox-swagger-ui/" + s;
}

@GetMapping("/webjars/springfox-swagger-ui/lib/{s:.+}")
public String js(@PathVariable String s) {
return "forward:/webjars/springfox-swagger-ui/lib/" + s;
}

@GetMapping("/webjars/springfox-swagger-ui/images/{s:.+}")
public String images(@PathVariable String s) {
return "forward:/webjars/springfox-swagger-ui/images/" + s;
}

@GetMapping("/swagger-resources/configuration/ui")
public String ui() {
return "forward:/swagger-resources/configuration/ui";
}

@GetMapping("/swagger-resources")
public String resources() {
return "forward:/swagger-resources";
}

@GetMapping("/v2/api-docs")
public String docs() {
return "forward:/v2/api-docs";
}

@GetMapping("/swagger-resources/configuration/security")
public String security() {
return "forward:/swagger-resources/configuration/security";
}
}

解决方法 - 3

使用 ViewControllerRegistry

参考百度其他人的方法

1
2
3
4
5
6
7
8
9
10
11
12
13
14
15
16
@Configuration
public class WebConfig extends WebMvcConfigurerAdapter {

@Override
public void addResourceHandlers(ResourceHandlerRegistry registry) {
registry.addResourceHandler("/user/**").addResourceLocations("classpath:/META-INF/resources/");
}

@Override
public void addViewControllers(ViewControllerRegistry registry) {
registry.addRedirectViewController("/user/v2/api-docs", "/v2/api-docs").setKeepQueryParams(true);
registry.addRedirectViewController("/user/swagger-resources/configuration/ui","/swagger-resources/configuration/ui");
registry.addRedirectViewController("/user/swagger-resources/configuration/security","/swagger-resources/configuration/security");
registry.addRedirectViewController("/user/swagger-resources", "/swagger-resources");
}
}

这种写法,访问静态资源的时候是完全没有问题的,但是 swagger-ui.html 页面在使用 ajax 调用接口的时候,这种配置做的是跳转,如 “/user/v2/api-docs” 自动跳转到 “/v2/api-docs” 其实是不满足我们需求的,因为 /v2/api-docs 这个路径根本就不会跳到我们的 user 应用。

解决方法 - 4

NGINX 端处理

将项目打成 war,项目名不用 ROOT,用二级路径名也是可行的,注意 nginx 端 conf 配置不要 expires 以下静态资源  location ~* .(?:jpg|jpeg|gif|png|ico|cur|gz|svg|svgz|mp4|ogg|ogv|webm|htc)$ { … }

如何解决Android设备上touchend无法触发问题

移动项目开发过程中,经常需要用到滑动的事件来处理一些效果。通常情况下,我们会通过  touchstart->touchmove->touchend   的过程来定义这个事件。这些事件的触发顺序是  touchstart, touchmove, touchmove ….. touchend  。绝大部分平板或手机也正如我们想象的那样有序执行着。但是以 Android 4.0.4 为首的一些可恶分子却有些不听话:他们的 touchend 事件没有如预期的那样触发。

监听这些事件我们会发现,当只是轻点一下屏幕时,touchend 可以正常触发。但是只要当 touchmove 被触发之后,touchend 就不会再被触发了,而且 touchmove 也没有持续触发。

在网上搜集了一些资料显示,这是 Android 上浏览器的 bug

On Android ICS if no preventDefault is called on touchstart or the firsttouchmove,
further touchmove events and the touchend will not be fired.

正如提到的我们只需要在 touchstart 或者 touchmove 里执行一下 e.preventDefault(); 就可以避免这个 bug。但是,问题来了:添加了 preventDefault 之后,正常的 scroll 事件也被屏蔽了!我们意外的发现滚动条也不能用了!

于是,我们开始尝试各种添加 preventDefault 事件的时机:闭包,延迟,判断等一一用上。最终焦点落在了 firsttouchmove 上,于是有了以下代码。

1
2
3
4
5
6
7
8
9
10
11
12
13
14
15
var touchY = 0;
$(this)
.on("touchstart", function (e) {
var touch = e.touches[0];
touchY = touch.clientY;
})
.on("touchmove", function (e) {
var touch = e.touches[0];
if (Math.abs(touch.clientY - touchY) < 10) {
e.preventDefault();
}
})
.on("touchend", function () {
// 你的滑动事件
});

基本上主要的思想就是在 touchmove 的时候判断出纵轴的位移量,当小于某个值的时候就认为是在执行左右滑动,且需要执行 preventDefault 来确保 touchend 可以正常触发。

如何在CentOS上部署golang

安装

yum install golang

环境变量

新建 go 目录作为项目目录
mkdir -p $HOME/go
用 cat 的方法在尾部增加配置配置 golang 的 GOROOT GOPATH

1
2
3
4
5
cat >>$HOME/.bash_profile<<EOF
export GOROOT=/usr/lib/golang
export GOPATH=\$HOME/golang
export PATH=\$PATH:\$GOROOT/bin
EOF

然后让配置生效
source $HOME/.bash_profile

检查

go env
输出内容即部署成功

更换节点

1
2
3
4
go env -w GO111MODULE=on
go env -w GOPROXY=https://mirrors.aliyun.com/goproxy/
设置不走 proxy 的私有仓库,多个用逗号相隔
go env -w GOPRIVATE=*.corp.example.com

语雀-Hexo 同步写作(yuque-hexo)

前情提要

于 CentOS 部署同步写作 yuque-hexo

部署阶段

一、自有服务器解决思路

1.安装 yuque-hexo

npm i -g yuque-hexo
进一步了解可查阅 官方文档地址

2.配置 package.json

1
2
3
4
5
6
7
8
9
10
11
12
13
14
15
16
17
18
19
20
21
22
23
24
25
26
27
"yuqueConfig": {
"postPath": "source/_posts/yuque",
"cachePath": "yuque.json",
"lastGeneratePath": "./last-generate-timestamp.txt",
"baseUrl": "https://www.yuque.com/api/v2",
"login": "catooilg",
"repo": "kb",
"onlyPublished": false,
"onlyPublic": false,
"token": "xxxxxxxxxxxxxxxxxxxxxxxxxxx" /*语雀token*/
"imgCdn": {
"concurrency": 0,
"imageBed": "oss",
"enabled": true,
"bucket": "icould",
"region": "oss-cn-shenzhen",
"prefixKey": "hexo-content/imgaes",
}
},
"scripts": {
"build": "hexo generate",
"clean": "hexo clean",
"deploy": "hexo deploy",
"server": "hexo server",
"sync": "yuque-hexo sync",
"clean:yuque": "yuque-hexo clean"
}

注意 imgCdn 里面也包含其他图床
腾讯云图床

1
2
3
4
5
6
7
8
9
10
"yuqueConfig": {
"imgCdn": {
"concurrency": 0,
"imageBed": "cos",
"enabled": true,
"bucket": "image",
"region": "ap-guangzhou",
"prefixKey": "blog-images"
}
}

七千牛

1
2
3
4
5
6
7
8
9
10
11
"yuqueConfig": {
"imgCdn": {
"concurrency": 0,
"imageBed": "qiniu",
"enabled": true,
"bucket": "test-letttgaco",
"region": "Zone_z2",
"host": "https://img.domain.cc",
"prefixKey": "blog-images"
}
}

Github 图床

1
2
3
4
5
6
7
8
9
10
"yuqueConfig": {
"imgCdn": {
"concurrency": 1,
"imageBed": "github",
"enabled": true,
"bucket": "LetTTGACO",
"host": "cdn.jsdelivr.net",
"prefixKey": "blog-images"
}
}

又拍云

1
2
3
4
5
6
7
8
9
10
"yuqueConfig": {
"imgCdn": {
"concurrency": 0,
"imageBed": "upyun",
"enabled": true,
"bucket": "letttgaco",
"host": "https://upyun.1874.cool",
"prefixKey": "blog-images"
}
}

如何获取语雀 Token?点击 个人头像 -> 设置 -> Token 即可获取

同时注册环境变量,为图床进一步配置
临时注册变量可以使用export SECRET_ID=xxxexport SECRET_KEY=xxx
永久注册变量可以 vim 修改/etc/profile 并 source 重载即可

如何获取各厂商图床 ID 和 KEY?清查阅云厂商密钥配置教程

各云厂商密钥配置教程
最后验证printenv

3.启动同步

npx yuque-hexo clean
第一次启动同步可以不选择清空缓存
SECRET_ID=$SECRET_ID SECRET_KEY=$SECRET_KEY npx yuque-hexo sync

4.启动 hexo

hexo clean && hexo g

二、部署在 Github/Gitee 解决思路

1.大纲

  • 在语雀中新建一个知识库,知识库里配置 Web Hook。
  • 在阿里云上创建函数计算模型**,**通过语雀的 Web Hook 去触发这个函数
  • 函数中配置了 Travis-CI(中介体读取 github/gitee 的库) 的 token,repoid,强制让 travis-ci 重新 restart 一次

2.安装与配置

与其上方一样

3.创建 serverless 云函数计算

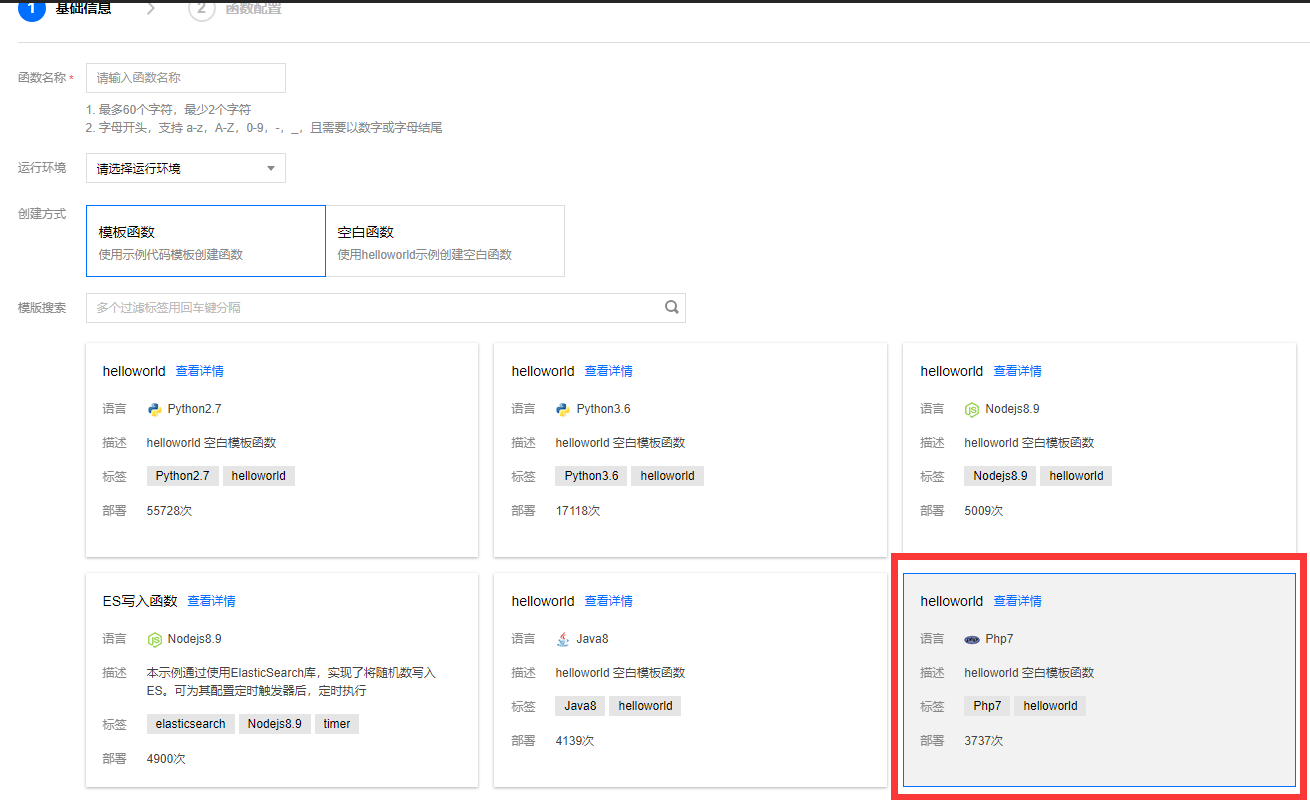
先开通阿里云开通函数计算,新建 HTTP 函数,运行环境选择 PHP7.2

按自己实际编写函数

1
2
3
4
5
6
7
8
9
10
11
12
13
14
15
16
17
18
19
20
21
22
23
24
25
26
27
28
29
30
31
32
33
34
35
36
37
38
39
40
41
42
43
44
45
46
47
48
49
50
51
52
53
54
55
56
57
58
59
60
61
62
63
64
65
66
67
68
69
70
71
72
73
74
75
76
77
78
79
80
81
82
83
84
85
86
87
88
89
90
91
<?php
function main_handler($event, $context) {
// 解析语雀post的数据
$update_title = '';
if($event->body){
$yuque_data= json_decode($event->body);
$update_title .= $yuque_data->data->title;
}
// default params
$repos = 'xxxx'; // 你的仓库id 或 slug
$token = 'xxxxxx'; // 你的登录token
$message = date("Y/m/d").':yuque update:'.$update_title;
$branch = 'master';
// post params
$queryString = $event->queryString;
$q_token = $queryString->token ? $queryString->token : $token;
$q_repos = $queryString->repos ? $queryString->repos : $repos;
$q_message = $queryString->message ? $queryString->message : $message;
$q_branch = $queryString->branch ? $queryString->branch : 'master';
echo($q_token);
echo('===');
echo ($q_repos);
echo ('===');
echo ($q_message);
echo ('===');
echo ($q_branch);
echo ('===');
//request travis ci
$res_info = triggerTravisCI($q_repos, $q_token, $q_message, $q_branch);

$res_code = 0;
$res_message = '未知';
if($res_info['http_code']){
$res_code = $res_info['http_code'];
switch($res_info['http_code']){
case 200:
case 202:
$res_message = 'success';
break;
default:
$res_message = 'faild';
break;
}
}
$res = array(
'status'=>$res_code,
'message'=>$res_message
);
return $res;
}

/*
* @description travis api , trigger a build
* @param $repos string 仓库ID、slug
* @param $token string 登录验证token
* @param $message string 触发信息
* @param $branch string 分支
* @return $info array 回包信息
*/
function triggerTravisCI ($repos, $token, $message='yuque update', $branch='master') {
//初始化
$curl = curl_init();
//设置抓取的url
curl_setopt($curl, CURLOPT_URL, 'https://api.travis-ci.org/repo/'.$repos.'/requests');
//设置获取的信息以文件流的形式返回,而不是直接输出。
curl_setopt($curl, CURLOPT_RETURNTRANSFER, 1);
//设置post方式提交
curl_setopt($curl, CURLOPT_CUSTOMREQUEST, "POST");
//设置post数据
$post_data = json_encode(array(
"request"=> array(
"message"=>$message,
"branch"=>$branch
)
));
$header = array(
'Content-Type: application/json',
'Travis-API-Version: 3',
'Authorization:token '.$token,
'Content-Length:' . strlen($post_data)
);
curl_setopt($curl, CURLOPT_HTTPHEADER, $header);
curl_setopt($curl, CURLOPT_POSTFIELDS, $post_data);
//执行命令
$data = curl_exec($curl);
$info = curl_getinfo($curl);
//关闭URL请求
curl_close($curl);
return $info;
}
?>

特此再声明一下:
$repo 是你在 Github / Gitte 的仓库 ID 一般是全数字 除非是自己自定义;不太清楚的可以通过 Postmen 请求
https://api.travis-ci.org/owner/你的 Github 账号/repos 获取,记得授权获取到 GitHub 的权限,Gitte 暂不支持。请求的时候请求头添加三个属性,
Authorization : token 你的 travis-ci token
Travis-API-Version : 3
User-Agent : API Explorer
返回结果 repo 就是你的仓库 ID
$token 就是 travis-ci 的 Token,记得授权获取到 GitHub / Gitte 的权限

4.测试函数

在阿里云点击运行函数,发现无报错即可成功同步语雀文章到自己博客。